Tuesday, January 11, 2011

Banana Oat Bundles

These got me through my gluten free, sugar free month long challenge I did a few months back.  They're surprisingly good, especially chilled!!  They only have a few tbsp. of oil, but I'm sure you could replace it with apple sauce.  Let me know if you try it!

A cross between a cookie and a mini-muffin, these bundles are a tasty, wholesome treat that are fast to prepare and can be enjoyed hot from the oven, or cooled to pack in lunches!

1 cup quick oats
1 cup ground oats (grind quick oa...ts in a processor until fine and crumbly)
1⁄4 cup unrefined sugar (I used agave)
1⁄4 tsp sea salt
1⁄4 tsp cinnamon or ground cardamon
1⁄4 tsp nutmeg
1 tsp baking powder
1 cup overripe banana, puréed (roughly 2 large bananas) (see note)
1 tsp pure vanilla extract
3 – 3 1⁄2 tbsp canola oil

Preheat oven to 350°F (176°C). In a large bowl, combine the oats, ground oats, sugar, sea salt, cinnamon, and nutmeg, and sift in the baking powder. Stir through until well combined. In another bowl, combine the puréed banana, vanilla, and canola oil, stirring through. Add the wet mixture to the dry mixture, and stir through until just well combined. Drop large spoonfuls onto a baking sheet lined with parchment paper. Bake for 12-15 minutes, until lightly golden. Remove from oven and let cool on pan for 1 minute, then transfer to a cooling rack.

Makes 12-15 bundles.

Note: Use a food processor or blender to purée the bananas. It produces a smooth, almost liquefied texture, which takes a long time to achieve by mashing.

Gluten Free Dark Chocolate Brownies

These are really good.  I think I even shocked Tim.  The original recipe called for brown rice flour, but I tried it with that and didn't like them as much. Walmart used to carry sorghum flour, but I haven't been able to find it lately (which is probably a good thing).  I'm sure Whole Foods has it though.

I got the original recipe from here:  http://glutenfreegoddess.blogspot.com/2006/01/dark-chocolate-brownies.html

5 ounces Belgian dark chocolate (I used an unsweetened dark chocolate bar)
1/2 cup butter or vegan margarine such as Smart Balance (or Spectrum Organic Shortening)
2 organic free-range eggs
1 cup packed organic light brown sugar
1/2 rounded cup almonds, processed into a fine meal
1/4 cup sorghum flour 
1/2 teaspoon fine sea salt
1/4 teaspoon baking soda
2 teaspoons vanilla extract (or 1 teaspoon vanilla plus 2 teaspoons peppermint extract for mint brownies)
 1/2 cup extra semi-sweet chocolate chips for the top

Preheat the oven to 350 degrees F. Line an 8x8-inch square baking pan with foil and lightly oil the bottom.

Using the microwave, melt the dark chocolate and butter in a large (microwave safe) measuring cup. Stir together to combine. Set aside.

In a mixing bowl, beat the eggs on medium high till frothy. Add the brown sugar and beat until the mixture is smooth.

Add the melted chocolate mixture into the egg-sugar mixture a little at a time - incorporate it slowly- and beat well for a good minute. The chocolate will look smooth and glossy.

In a bowl, combine the dry ingredients: almond meal, rice flour, fine sea salt and baking soda; whisk together. Add the dry flour mix into the chocolate mixture and beat well for a minute. Add the vanilla, beat another half a minute or so.

If you are adding nuts, stir in the nuts by hand and spread the batter into the prepared baking pan [this brownie batter is much thinner than any brownie mix batter I've tried- don't worry, it's going to be wonderful]. Shake the pan a little bit to even out the batter. Layer the semi-sweet chips all over the top of the batter and press them in slightly, if adding.

Bake in the center of a preheated 350 degree F oven for 33 to 35 minutes, or until the brownies are set. Don't overcook. (Err on the side of gooey, if you must- that's what I do; I find gluten-free brownies taste better slightly undercooked and soft in the middle than over-cooked and crumbly.)

Cool on a wire rack; and remove the brownies from the pan by gripping the foil edges. Chill before cutting.
Makes 9-12 servings.


Jelly Donut Cupcakes

So yummy!  These are from Veganomicon.  My favorite part is that you can eat the batter!  No eggs!  The recipe calls for the cheapest jelly you can find.  I used our "healthier" jelly once and it wasn't as good.  So get the smuckers!  And they're good right out of the oven AND the next day. Two different experiences!  So try to save some.

Ingredients
  • 1 cup soymilk
  • 1 tsp apple cider vinegar
  • 2 tbs cornstarch
  • 1 1/2 cups flour
  • 3/4 tsp baking powder
  • 1/2 tsp baking soda
  • 1/2 tsp ground nutmeg
  • 1/2 tsp salt 
  • 1/3 cup canola oil
  • 3/4 cup + 2 tbs sugar
  • 2 tsp vanilla
  • 1/3 cup raspberry, strawberry
  • 2 tbs powdered sugar
How to make it
  • Preheat oven to 350º and line a cupcake tin with paper liners. In a mixing cup, combine the soymilk, vinegar and cornstarch and set aside.
  • In a large mixing bowl, sift together flour, baking powder, baking soda, nutmeg and salt. Create a well in the center of the flour for the wet ingredients.
  • Mix the soymilk mixture with a fork to dissolve the cornstarch and pour into the flour mixture. Add the oil, sugar and vanilla, and mix well.
  • Fill the liners with batter 3/4 full. Place a heaping spoonful of jam into the center of each cupcake, being careful not to overfill. The jam will sink into the bottom of the cupcake during baking.
  • Bake cupcakes for 21 to 23 minutes. Cool completely on a wire rack, and then set uncovered overnight in a cool and dry place. This will make the tops slightly crispy, like a donut crust. Using a sifter, sprinkle with powdered sugar and serve with coffee.

Chocolate Chip Pumpkin Cupcakes with Cinnamon Icing

I got this from Vegan Cupcakes Take Over the World.  So far all the cupcakes I've made are delicious so they may just do that (take over the world, that is).  These are our favorite so far.  I made these for Sam's birthday.

1 cup canned pumpkin
⅓ cup oil
1 cup granulated sugar
¼ cup soy milk
1 teaspoon vanilla extract
1 ¼ cups all-purpose flour
½ teaspoon baking powder
½ teaspoon baking soda
½ teaspoon ground cinnamon
¼ teaspoon salt
½ cup chocolate chips (I use mini choc. chips)


Step 1
Preheat oven to 350 degrees F. Line a muffin tin with liners.

Step 2
In a medium bowl, combine pumpkin, oil, sugar, soy milk and vanilla. Stir in flour, baking soda, baking powder, cinnamon and salt. Stir with a fork. Once well combined, fold in chocolate chips.

Step 3
Fill liners 2/3 full. Bake for 22-24 minutes. Transfer to a wire rack and cool completely before icing.

Cinnamon Icing (doesn't make much - pipe or spread on a tiny amount):
1/2 cup powdered sugar
1/2 tsp. cinnamon
2 tbsp. margarine - melted
1 tbsp. soy milk (I used almond)
1/2 tsp. vanilla extract

Place sugar and cinnamon in a small bowl.  Add the margarine, soy milk, and vanilla and stir with a fork until smooth.  Keep at room temp. until ready to use.  The mixture should look opaque and honey brown.  If it's glistening a lot or looks too liquid (mine was) add a little extra powdered sugar.

Black Bean Tacos with Roasted Peppers and Onions

I can't find where I found this recipe but it's really good!!

SIDE NOTE: I leave most of the toppings at the end and these are yummy as is.  I also don't think you need 1 tbsp. of olive oil in the taco mixture.  Just spray a bit of Pam in there.

Roasted Peppers and Onions:
·    2 red bell peppers, thinly sliced (about 2 cups)
·    1 large onion, thinly sliced (about 1 1/2 cups)
·    1 Tbs. olive oil (I use less)

Tacos
·    1 Tbs. olive oil
·    1 medium-size onion, chopped (about 1 cup)
·    6 cloves garlic, minced (about 2 Tbs.)
·    2 15-oz. cans black beans, drained and rinsed
·    1 15-oz. can diced organic fire-roasted tomatoes
·    1 Tbs. chili powder
·    1 Tbs. ground cumin
·    1/8 tsp. hot sauce, or more to taste
·    16 organic corn taco shells, warmed

Toppings (optional)
·    shredded lettuce
·    salsa
·    2 large tomatoes, diced (2 cups)
·    avocados, diced (about 2 cups)
·    shredded Cheddar or Jack cheese
·    low-fat sour cream

Directions:
Preheat oven to 450F.

1. To make roasted peppers and onions: toss peppers and onion with oil on large baking sheet. Season with salt and pepper. Roast 15 minutes, stir, and roast 15 minutes more, or until vegetables   are tender and peppers are beginning to blacken. Transfer to small bowl.

2. Meanwhile, make tacos: heat oil in large pot over medium heat. Add onion and sauté 5 to 7 minutes, or until soft. Add garlic, and cook 1 minute more, or until fragrant. Stir in beans, tomatoes, chili powder, cumin, hot sauce and 1 cup water. Season with salt and pepper. Reduce heat to medium low, and simmer 15 minutes, or until most of liquid has evaporated, stirring occasionally. Mash beans until filling is thickened, but chunky, and most beans remain intact. Adjust seasonings, if necessary. Transfer to serving bowl.

Pass taco shells, filling, roasted peppers and onions and toppings around the table.

Gnocchi with Zucchini Ribbons and Portabella Mushrooms

This recipe came from Fat Free Vegan - http://blog.fatfreevegan.com/2007/04/gnocchi-with-zucchini-ribbons-and.html

It's good.  It's a light, easy, quick meal that Syd and I like.  And then Tim made it.  And did his "thing" to it.  And of course made it better.  Butt head.  Always has to out-do me.  As long as I profit from it, I guess.  Tim added the onion, bell pepper, and spaghetti sauce so if you want something a little lighter, try it without those.  It's good both ways!!  Tim's changes are at the end.  OH - and get  sweet potato gnocchi - it's the best kind!!  This serves around 4, if you're eating small portions.  I'd double it so you have left overs.

Gnocchi with Zucchini Ribbons and Portabella Mushrooms

one 17-ounce package prepared gnocchi
2 cloves garlic, minced
6 ounces portabella mushrooms, cut into cubes
2 medium tomatoes, chopped
1 teaspoon dried basil
1/4 cup vegetable broth
2 medium zucchini, sliced lengthwise into ribbons (I used a serrated vegetable peeler) or cubed

salt and freshly ground pepper to taste

Cook gnocchi according to package directions. Drain immediately and set aside.

Lightly spray a large non-stick skillet with olive oil.  Add the garlic, and mushrooms, and sauté over medium-high heat until mushrooms soften. Add the tomatoes and basil and cook for about 2 minutes. Add the broth and zucchini and cook until it is just tender (ribbons will be done in just a couple of minutes while cubes take longer). Add the gnocchi and salt and pepper to taste.

Tim's way:
ADD:
1/2 cup sweet onion cut into thin strips
1/2 cup bell pepper cut into thin strips
1 cup spaghetti sauce
Saute the onions until translucent and yummy.  Add the bell peppers with the mushrooms.  I'd warm the spaghetti sauce separately and add it at the end.  Enjoy!

Tuesday, December 7, 2010

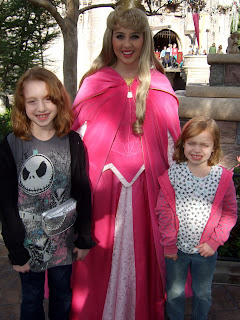
Happiest Place on Earth (aside from the 2 billion people getting in my way)


Friday, June 18, 2010

Focaccia heaven.

This is the BEST bread ever.  And I made it!  And it turned out!  There were a few precarious moments where I almost panicked because I couldn't get it out of the pan, but I prevailed! 


Recipe from My Bread - No Knead Method by Jim Lahey.  Awesome book with lots of easy and yummy bread. 

Equipment: A 13 by 18 inch rimmed baking sheet

Ingredients:

about 1 cup peeled yukon gold potato, cut into 1 inch chunks  (I used red and it worked too)
2 1/2 cups cool water
4 1/2 cups (600 grams) bread flour
2 1/2 teaspoons instant or other active dry yeast
1 teaspoon sugar
1 1/2 teaspoons table salt
1/4 cup EVOO

1. Put potatoes and the 2 1/2 cups water into a small saucepan, cover, bring to boil over high heat.  Cook until potato chunks fall apart when pierced with a fork.

2. Use a blender, immersion blender, or food mill to puree the potatoes with the 2 1/2 cups cooking water until smooth.  Let mixture cool to 120 degrees F; it will feel very warm to the touch but not scalding.

3. In a large bowl, stir together the flour, yeast, sugar, and half the salt.  Add the potato puree and, using a wooden spoon or your hands, mix until you have a wet, sticky dough, about 30 seconds.  Cover the bowl and let it sit at room temperature until the dough is tripled in size, 2 to 3 hours.

4. Oil a 13 x 8 inch rimmed baking sheet (make sure you oil the sides as well or it will get stuck like mine!).  Use a bowl scraper or spatula to scrape the dough onto the baking pan; it will still be quiet loose and sticky.  Gently pull the dough and stretch it across the surface of the pan. Then oil your hands and press the dough evenly out to the edges.  Drizzle with 3 tablespoons of the olive oil and sprinkle with the remaining salt.  Use your fingertips to create dimples all over the surface of the dough.  Let the dough rise in a warm, draft free spot until it has risen just over the edges of the pan, 45 minutes to an hour.

5. Half an hour before the end of the second rise, preheat the oven to 400 degrees F, with a rack in the center.

6. Gently place the focaccia in the oven on the center rack (the risen dough is delicate; a bump going into the oven could collapse it) and bake for 30 to 45 minutes (mine took 30) until the top is evenly golden brown.  Transfer the pan to a rack to cool, and give it at least a few minutes before slicing and serving warm or at room temperature.  (if it gets stuck in the pan like mine did, I ran a knife around the edge and the bottom as far as I could, turned it over, and tried to twist it out like an icecube tray.  It was messy but eventually worked without too much damage!!)

Try not to eat it all in one sitting.

Saturday, June 12, 2010

Chocolate Chip Scones


These are YUMMY.  Sydney's favorite part (aside from eating them) was squishing the butter into the flour mix.  I cut them in half (with a sharp knife) after they cool because they are pretty big.

6 tablespoon (3/4 stick) chilled unsalted butter, cut into 1/4" pieces
1 cup all purpose flour
1 cup whole grain flour
1/3 cup sugar
1 teaspoon baking powder
1/2 teaspoon baking soda
1/2 teaspoon salt
3/4 cup chocolate chips (I used white chocolate swirled with milk chocolate)
3/4 cup buttermilk (I used soy milk!)
1 large egg yolk
1 teaspoon pure vanilla extract
1 tablespoon demerara sugar (I don't know what this is so I just use sugar)

Directions:
Preheat oven to 400F.  Spray baking sheet and dust with flour, shaking off excess.

In a large bowl, whisk together flours, sugar, baking powder, baking soda, and salt.  Add butter: rub in with fingertips until mixture resembles coarse meal.  Mix in chocolate chips.

In a medium bowl, mix milk, egg yolk, and vanilla.  Whisk to combine.  Add milk mixture to dry ingredients.  Stir until combines (dough will be sticky).  Using floured hands, turn out dough onto a floured work surface, form inot a 7 to 8 inch round, and cut into 8 wedges.  Use a small spatula or the side of your knife to transer wedges to prepared baking sheet, spacing 1 inch apart (it's ok if wedges are mishapen).

Brush scones lightly with milk and sprinkle with sugar.  Bake until scones are golden and tester inserted into center comes out clean, about 20 minutes.  Serve warm or at room temperature.

  © Blog Design by Simply Fabulous Blogger Templates

Back to TOP